Are you tired of the worn-out look of your motorcycle seat and doesn’t know How To Wrap A Motorcycle Seat? It’s time to give it a fresh new look by wrapping it yourself!
Wrapping a motorcycle seat is not as daunting as it may seem, and with a few simple steps, you can achieve a professional-looking result.
In this article, we will guide you through the process of wrapping your motorcycle seat, from gathering the necessary materials to adding those final design elements.
You’ll learn how to prepare the seat, measure and cut the new cover, and attach it securely for a tight and smooth fit.
We’ll also show you how to trim any excess material and add any additional details you desire. So, grab your materials and get ready to transform your motorcycle seat into a stylish and comfortable masterpiece!
Key Takeaways
- Motorcycle seat wrapping involves gathering materials, preparing the seat, measuring and cutting a new cover, and attaching it securely.
- Accurate measurements and attention to detail are crucial for a perfect fit and professional-looking result.
- Choosing durable and weather-resistant materials, such as leather or vinyl, is important when selecting the seat cover.
- Regular maintenance, including cleaning and conditioning the seat, is necessary to maintain its appearance and feel.
How To Wrap A Motorcycle Seat? (Step By Step Guide!)
To wrap a motorcycle seat, you will need to remove the old seat cover, clean the seat pan, measure the seat pan, buy the fabric, cut the fabric, place the fabric on the seat pan, staple the fabric to the seat pan, overlap the fabric and staple it again, trim off the excess fabric, and install the seat cover.
First, remove the old seat cover by using a screwdriver or a pry bar to pry it off the seat pan. Be careful not to damage the foam or the seat pan.
Once the old seat cover is removed, clean the seat pan with a damp cloth to remove any dirt, grease, or debris.
Next, measure the length, width, and height of the seat pan. This will help you determine how much fabric you need to buy. You can buy fabric specifically designed for motorcycle seats, or you can use any type of fabric that you like.
Once you have bought the fabric, cut it to the size of the seat pan. You may want to add a few inches of extra fabric to allow for some overlap.
Center the fabric on the seat pan and smooth it out. Then, use a staple gun to staple the fabric to the seat pan, starting in the center and working your way out to the edges.
Overlap the fabric by a few inches and staple it again. This will help to prevent the fabric from coming loose. Trim off any excess fabric. Finally, put the seat cover back on the seat and secure it with screws or bolts.
Here are some additional tips for wrapping a motorcycle seat:
- Use a sharp blade to cut the fabric. This will help to prevent the fabric from fraying.
- Use a quality staple gun. This will help to ensure that the staples are secure and will not come loose.
- Use a sealant on the fabric if you are using a fabric that is not specifically designed for motorcycle seats. This will help to make the fabric water-resistant.
- If you are not comfortable wrapping the seat yourself, you can take it to a professional.
Here is a detailed step by step guide to wrap up your scooter.
1. Gather the Necessary Materials
Get ready to transform your motorcycle seat with just a few essential materials! The first step in wrapping your motorcycle seat is selecting the right seat cover material.
There are various options available, such as leather, vinyl, or even fabric. Consider factors like durability, comfort, and weather resistance when making your choice.
Once you have the perfect material, it’s time to gather the necessary tools. You will need a staple gun, staples, scissors, and a heat gun.
2. Prepare the Seat

To prepare the seat for wrapping, you need to follow two important steps:
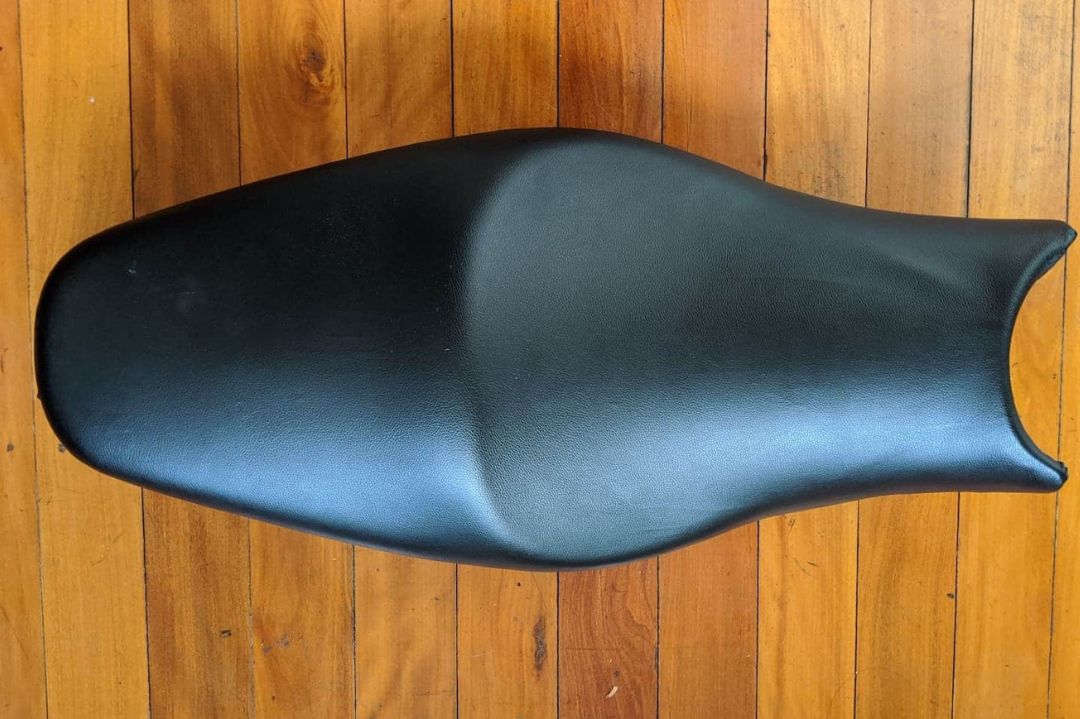
Remove the Existing Cover
Carefully peel back the worn leather cover, revealing the cushioned foam underneath. To remove the existing cover, start by locating the staples or clips that secure it to the seat base.
Use a staple remover or pliers to carefully detach these fasteners, taking care not to damage the foam or seat base.
Once the cover is loosened, gently pull it away from the foam, being mindful of any delicate areas or attachments.
Clean and Smooth the Seat Surface
First, take a moment to thoroughly clean and smooth the surface of your seat, ensuring a comfortable and polished final result. Proper seat maintenance is crucial for a successful motorcycle seat wrap.
Start by removing any debris or dirt using a soft brush or vacuum cleaner. Next, use a mild detergent and warm water to clean the seat, gently scrubbing away any stains or grime. Once clean, let the seat dry completely.
To achieve a smooth surface, sand any rough areas or imperfections using fine-grit sandpaper. This will help the new cover adhere properly and prevent any wrinkles or bumps. After sanding, wipe the seat down with a damp cloth to remove any dust or residue.
3. Measure and Cut the New Cover

To successfully measure and cut the new cover for your motorcycle seat, it’s crucial to take accurate measurements and use a sharp knife or scissors to cut the material.
Accurate measurements ensure that the cover fits perfectly, providing a comfortable and secure seating experience. Using a sharp knife or scissors ensures clean and precise cuts, allowing for a professional-looking finish.
Make sure to be precise and meticulous in these steps to achieve the best results for your motorcycle seat cover.
Take Accurate Measurements

Make sure you accurately measure the length, width, and thickness of your motorcycle seat before starting the wrapping process. This step is crucial to ensure that the new cover fits perfectly and provides maximum comfort.
To help you with this task, use the following table to record your measurements:
| Measurement | Front | Middle | Back |
|---|---|---|---|
| Length | 11.7 | 11 | 11.7 |
| Width | 8.9 | 9.3 | 8.9 |
| Thickness | 2 | 2 | 2 |
When measuring the length, start from the front of the seat and go all the way to the back. For the width, measure from one side of the seat to the other.
Lastly, measure the thickness by placing a ruler or tape measure on top of the seat and determining its height.
Use a Sharp Knife or Scissors to Cut the Material

Once you’ve accurately measured your motorcycle seat, you can skillfully use a sharp knife or scissors to cut the chosen material for a precise and professional-looking finish. Cutting the material correctly is crucial to ensure a snug fit and a seamless appearance.
Here are three cutting techniques to consider:
- Straight cuts: Use a ruler or straight edge to guide your knife or scissors along the desired line. Take your time and make slow, deliberate cuts to avoid any mistakes.
- Curved cuts: For curved sections of the seat, use small, precise snips with scissors or make multiple straight cuts to create the desired shape. Take care to maintain even spacing and smooth curves.
- Alternative materials: If you’re looking for a unique or more durable option, consider using alternative materials such as leather, vinyl, or synthetic fabrics. These materials may require different cutting techniques, so be sure to research and practice beforehand.
4. Attach the New Cover
First, grab the new cover and position it over the motorcycle seat. Make sure it’s centered and aligned properly.
Starting at the front of the seat, pull the cover tightly and secure it in place with staples or clips. Work your way along the sides, pulling the cover snugly and fastening it securely.
Continue until you reach the back of the seat. If there’s excess material, use a sharp knife or scissors to trim it off, being careful not to cut too close to the staples or clips.
Smooth out any wrinkles or creases as you go, ensuring a clean and professional-looking finish.
Take your time and pay attention to detail, as a properly attached cover won’t only look great but also provide comfort and durability.
5. Ensure a Tight and Smooth Fit
To ensure a tight and smooth fit, you’ll want to carefully position and align the new cover over your bike’s seat.
Start by ensuring that the cover is centered and straight, with equal amounts of excess material on all sides. This will help achieve a balanced and symmetrical appearance.
Once the cover is in position, begin by pulling the material taut, working from the center towards the edges. This will help eliminate any wrinkles or slackness that may occur.
Use your hands to smooth out any creases or bumps, ensuring that the cover is stretched evenly across the entire seat.
To achieve the desired tightness level, you may need to use a staple gun or adhesive to secure the edges of the cover underneath the seat.
6. Trim Excess Material
After making sure you have a tight and smooth fit, carefully trim any excess material from the cover.
Trimming the excess material is an important step in wrapping a motorcycle seat because it ensures a clean and professional finish.
Here are some trimming techniques you can use to achieve the desired result:
- Use sharp scissors or a utility knife to cut away the excess material. Make sure to cut close to the edge of the seat to maintain a neat appearance.
- Take your time and trim small sections at a time to avoid cutting too much or unevenly.
- If you’re using fabric that frays easily, consider using fabric glue or fray check along the cut edges to prevent fraying and unraveling.
7. Add any Additional Details or Design Elements
When adding any additional details or design elements to your motorcycle seat, there are a few key points to consider.
First, think about adding piping or embroidery to enhance the overall look and feel of the seat. This can add a touch of elegance or uniqueness to your bike.
Additionally, personalizing the seat with graphics or logos can make it truly stand out and reflect your own personal style. Whether you choose to add subtle details or bold designs, these elements can make a big impact on the overall aesthetic of your motorcycle seat.
Consider Adding Piping or Embroidery
Enhance the aesthetic appeal of your motorcycle seat by considering the addition of stylish piping or intricate embroidery.
Adding decorative stitching can elevate the overall look of your seat, creating a unique and personalized design. It adds a touch of sophistication and elegance to your motorcycle, making it stand out from the crowd.
Here are five reasons why piping or embroidery can be a great addition to your motorcycle seat:
- Adds a pop of color and visual interest
- Enhances the overall design and style
- Provides a luxurious and high-end look
- Allows for customization and personalization
- Increases the resale value of your motorcycle
Personalize the Seat with Graphics or Logos
Customizing your ride with personalized graphics or logos on the seat adds a touch of individuality and showcases your unique style.
When it comes to personalization options, you have a wide range of choices.
Graphics can include anything from your favorite sports team logo to intricate designs that reflect your personality. Logos can be a great way to showcase your affiliation with a particular brand or club.
Watch Video: How To Wrap A Motorcycle Seat?
8. Test and Enjoy Your Newly Wrapped Motorcycle Seat
To fully appreciate your newly wrapped motorcycle seat, simply take it for a spin and relish in the comfortable and stylish upgrade. Here are some tips to help you enjoy your ride even more:
Test Results:
- Pay attention to how the new seat feels during your ride. Notice if it provides better support and reduces fatigue.
- Observe any changes in the overall riding experience, such as improved stability or reduced vibrations.
- Take note of any discomfort or issues that may need adjustment or further customization.
Maintenance Tips:
- Regularly clean and condition the seat to keep it looking and feeling its best.
- Avoid using harsh chemicals or abrasive materials that could damage the seat’s surface.
- Consider investing in a seat cover or protective coating to prolong the life of your newly wrapped seat.
Frequently Asked Questions
How Long Does It Typically Take to Wrap a Motorcycle Seat?
To prevent wrinkles when wrapping a motorcycle seat, choose a fabric with good elasticity.
Take your time when stretching the fabric and use a staple gun to secure it tightly. The process typically takes around 1-2 hours.
Can I Use Any Type of Fabric to Cover My Motorcycle Seat?
Yes, you can use different types of fabric to cover your motorcycle seat. However, it’s important to consider the pros and cons of each fabric.
Can I Use a Staple Gun to Attach the New Cover to The Seat?
Yes, you can use a staple gun to attach the new cover to the motorcycle seat. However, there are alternatives to a staple gun such as adhesive or hog rings. .
How Often Should I Replace the Cover on My Motorcycle Seat?
To ensure optimal comfort and appearance, it is recommended to replace the cover on your motorcycle seat every 1-2 years, depending on usage and conditions.
Bottom Line: How To Wrap A Motorcycle Seat?
Now that you’ve successfully wrapped your motorcycle seat, you can enjoy the comfortable and stylish upgrade it provides.
By following the steps outlined in this article, you ensured a tight and smooth fit for your new cover.
Remember to trim any excess material and add any additional details or design elements to personalize your seat.
Take your motorcycle for a test ride and enjoy the improved aesthetics and comfort of your newly wrapped seat.