
How To Test Starter Relay Motorcycle? In order to test the starter relay on a motorcycle, it is necessary to conduct a series of tests in order to evaluate its functionality. Firstly, one must inspect the relay for any signs of physical damage or other abnormalities.
Secondly, a voltage test should be performed to determine if there is sufficient power being supplied to the component. Thirdly, an ohmmeter may be used to measure resistance in the circuit and check for any shorts or breaks that may be present.
Having a reliable motorcycle is essential for any rider. A key component of the bike’s ignition system is the starter relay motor. It is important to ensure that this part is in good condition to avoid any potential problems with starting your bike.
Testing the starter relay on a motorcycle is an important part of routine maintenance and can help you identify potential problems with your engine before they become serious.
This article will provide a step-by-step guide on how to test your starter relay.
What Is A Starter Relay?
ACDelco Professional D1741C Multi-Purpose Relay

- Professional
- Premium
- Durable
- Value for Money
A starter relay is a small electronic device that helps turn the engine over when you push the start button.
The starter relay consists of two main components: the transistor and the coil. When you push the start button, the transistor sends an electrical current through the coil.
This current creates a magnetic field, which causes the starter motor to turn.
How To Test Starter Relay Motorcycle?
To test a starter relay, you’ll first need to check continuity. This means checking to see if there is a continuous path of electricity between each of the relay’s terminals.
Here are simple steps to test your starter relay:
Tools Needed:
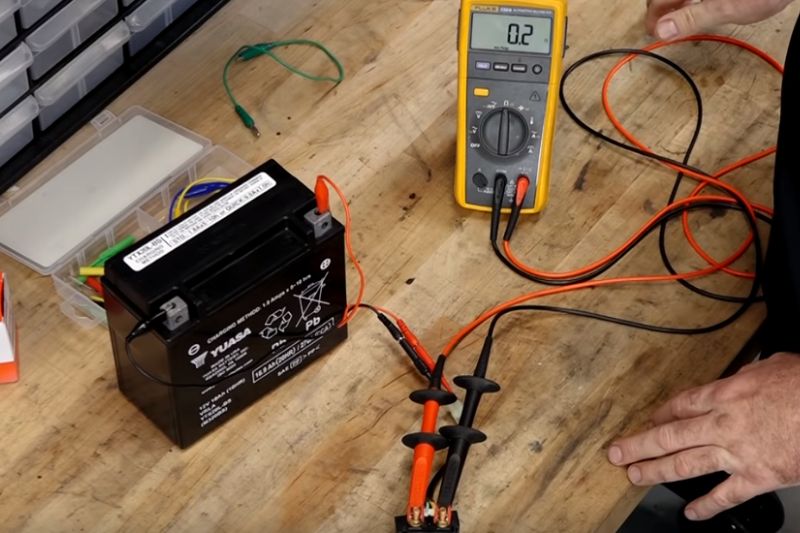
- Digital Multimeter
- Back Probe Kit
- Safety Glasses And Gloves
Testing For Electrical Resistance:
If there is a problem with the starter motor, you may also find that the electrical resistance in the circuit is high.
To test for electrical resistance, you’ll need to remove the battery and measure the resistance between each of the wires connected to it.
You can also use a digital multimeter to measure voltage and current in the circuit.
Testing For Voltage:
If there is a problem with the starter motor, you may also find that there is no voltage at either of the relay’s terminals.
To test for voltage, you’ll need to connect one terminal of your testing equipment to each relay’s terminal. Then, use a voltmeter to measure the voltage at each terminal.
Testing For Current:
If there is a problem with the starter motor, you may also find that there is no current flow through either of the relay’s terminals.
Here are simple steps, just follow them to test your starter relay:
1. The Solenoid Has Two Wires That Normally Connect To The Starter Button:
If the starter relay has been damaged, one of the wires may have been pulled out of the connector.
In order to test for this, you’ll need to remove the cover and connect one end of a wire to each contact inside the solenoid.
Then, reattach the cover and test the starter by pushing the start button.
2. Connect The Battery:
If the starter relay has been damaged, one of the wires may have been pulled out of the connector.
In order to test for this, you’ll need to remove the cover and connect one end of a wire to each contact inside the solenoid.
Then, reattach the cover and test startup by connecting the battery.
3. Connect A Second Back Probe To The Solenoid:
If the starter relay has been damaged, you may also find that there is no power going to the solenoid. To test for this, you’ll need to connect a second back probe to the solenoid.
Then, use a voltmeter to measure the voltage at each contact on the back probe.
If the starter relay has been damaged, you may also find that there is no power going to the solenoid. To test for this, you’ll need to connect it to the positive side of the battery.
4. Push The Start Button:
If the starter relay has been damaged, you may also find that there is no power going to the solenoid. To test for this, you’ll need to push the start button.
5. Hear An Audible “Click”: IF You Hear Then It Is Good:
It’s a sound that confirms that you’ve done something correctly. If you hear it, then it’s a good sign! An audible click can be heard when you’re assembling something, when you turn something on, or when you press a button.
This is a sign that it is done correctly. Hearing an audible click is not only a sign of success but it also gives you confidence to continue with the task at hand.
6. IF You Don’t Hear It, The Relay Has Gone Bad:
If you don’t hear an audible click, then the relay has gone bad and needs to be replaced. In order to test this, you’ll need to remove the cover and connect one end of a wire to each contact inside the solenoid.
Then, reattach the cover and test startup by pushing the start button.
If you still don’t hear an audible click, then the relay needs to be replaced and will need to be purchased from a motorcycle repair shop.
Testing For Voltage Drop: (Test Starter Relay With Multimeter!)
If you’re having trouble with the starter relay, it may be because there is a voltage drop. This means that there is not enough power available to the solenoid and the motorcycle will not start.
To test for this, you’ll need to connect a voltmeter to each contact on the back probe and measure the voltage at each point.
If there is a voltage drop, then the relay needs to be replaced and will need to be purchased from a motorcycle repair shop. Here are simple steps to test it:
1. Simply Disconnect The Back Probe From The Battery:
To test for this, you’ll need to connect a voltmeter to each contact on the back probe and measure the voltage at each point.
If there is a voltage drop, then the relay needs to be replaced and will need to be purchased from a motorcycle repair shop.
2. Connect Your Multimeter To The Main Connectors:
You’ll need to connect your multimeter to the main connectors on the back of the bike and measure the voltage at each point.
If there is a voltage drop, then the relay needs to be replaced and will need to be purchased from a motorcycle repair shop.
3. Set Your Multimeter To A Resistance Test:
Setting up your multimeter to a resistance test is an important step in diagnosing and troubleshooting electrical circuits.
First, make sure the multimeter is turned off and the leads are not touching each other. Then, set the selector switch to the resistance test range.
Depending on the multimeter you have, this may be marked as “ohms”, “Ω”, or a symbol that looks like an upside-down horseshoe.
Using the dial or arrows on the multimeter, select a range that is higher than the expected resistance value. Connect the leads to the part of the circuit that you want to test and then turn on the multimeter.
The display will show a resistance value in ohms. If it reads 0 ohms, then there is no resistance and if it reads 1, then there is infinite resistance.
Compare the result to known values and inspect the circuit further if necessary.
4. Once Connected, You Should See “OL,” Indicating An Open Circuit.
When connecting a circuit, it’s important to know how to test it to ensure that it is working. One of the most common tests is to use a multimeter to measure the resistance.
If the circuit is open, you should see an OL (Open Loop) reading on the multimeter. This indicates that the circuit has no resistance and is not closed.
To test it further, you should check for continuity, which means ensuring there are no breaks in the circuit.
This is done by connecting the positive and negative probes of the multimeter to each end of the circuit and checking for a reading other than OL.
If you get a reading other than OL, then you know there is continuity and the circuit is closed.
How To Replace A Starter Relay On A Motorcycle?
To get started, you’ll need to locate the starter relay, which is usually found near the battery, sometimes inside the frame.
Once you have located it, disconnect the battery first and then the starter relay, making sure to take note of the wiring configuration for when you replace it.
After disconnecting the starter relay, you can now replace it with a new one. When reconnecting the wiring, make sure to connect it up the same way as before.
Before reattaching the battery, check all of your connections to make sure they are secure. Finally, reattach the battery, turn on your motorcycle and test it out.
Why Would My Starter Not Work?
There could be a number of reasons why your starter might not be working, but the most common is a broken wire.
If you’re unable to start your motorcycle and the problem seems to stem from the starter itself, it’s best to take it in for repairs.
How To Fix A Starter Relay That Won’t Turn On?
Fortunately, fixing a starter relay that won’t turn on is relatively simple and can usually be done in a few easy steps.
First, you’ll need to disconnect the negative terminal from the battery to avoid any potential sparks. Then, locate the starter relay in your vehicle’s fuse box and remove it.
Inspect the relay for any visible damage, such as burned out contacts or melted wires, and replace it if necessary.
Once the new relay is installed, reconnect the negative terminal and test your starter motor.
What Else Could Cause My Starter Not To Work?
There are a number of other reasons why your starter might not be working, including a faulty electrical system or broken wiring. \
If you’re having trouble starting your motorcycle and think it might be due to the starter, it’s best to take it in for repairs.
Conclusion: How To Test Starter Relay Motorcycle?
How To Test Starter Relay Motorcycle? Testing the starter relay on your motorcycle is a great way to ensure it will start when you need it.
If you detect any irregularities or malfunctions, inspect the switch, wiring and connections before replacing the relay with a new one.
Additionally, make sure the battery is charged and clean all of the contacts with sandpaper or carbon paper.
With proper maintenance and testing, you can be sure that your motorcycle’s starter relay will run like a well-oiled machine.
FAQs
How Do I Know If My Motorcycle Relay Is Bad?
One must first evaluate its functionality and compare it to the expected performance standards. This can be accomplished through a variety of tests, such as visual inspection, continuity testing and voltage drop measurements.
If any anomalies are observed during these examinations, it can indicate that the relay has malfunctioned in some way and may need to be replaced.
How Do I Know If My Starter Relay Is Broken?
If the relay is broken, the circuit will be unable to complete due to insufficient current flow; hence, one can infer that the starter relay has malfunctioned.
Additionally, if the starter motor fails to initiate when prompted, this could be indicative of a faulty starter relay.