How to Seat a Tubeless Tire? (Fix In Just 5 Minutes!)
Author:
Jimmy Grey
Affiliate Disclaimer
As an affiliate, we may earn a commission from qualifying purchases. We get commissions for purchases made through links on this website from Amazon and other third parties.
Seating a tubeless tire on your bike can be a simple process if you follow the right steps. So, how do you seat a tubeless tire of your bike?
Well, it involves ensuring proper tire and rim compatibility, using an air compressor or floor pump to create a burst of air pressure, and employing some techniques to help the tire snap into place securely.
In this article, we will guide you through the necessary steps to successfully seat a tubeless tire on your bike without much hassle. So, How to Seat a Tubeless Tire? Lets delve into the subject to learn the best way!
Table of contents
What Is a Tubeless Tire?
A tubeless tire is a type of tire that does not require an inner tube to hold air. Instead, the tire itself forms an airtight seal with the rim, allowing air to be directly pumped into the tire.
How to Seat a Tubeless Tire?
To seat a tubeless tire, you need to clean the rim and tire beads, apply tubeless sealant, install the tire on the rim, and inflate the tire. You may need to use an air compressor or CO2 inflator if the tire does not seat properly.
Here are the steps in more detail:
Clean the rim and tire beads with soapy water.
Apply a thin layer of tubeless sealant to the inside of the tire.
Install the tire on the rim, making sure that the bead is seated properly on both sides of the rim.
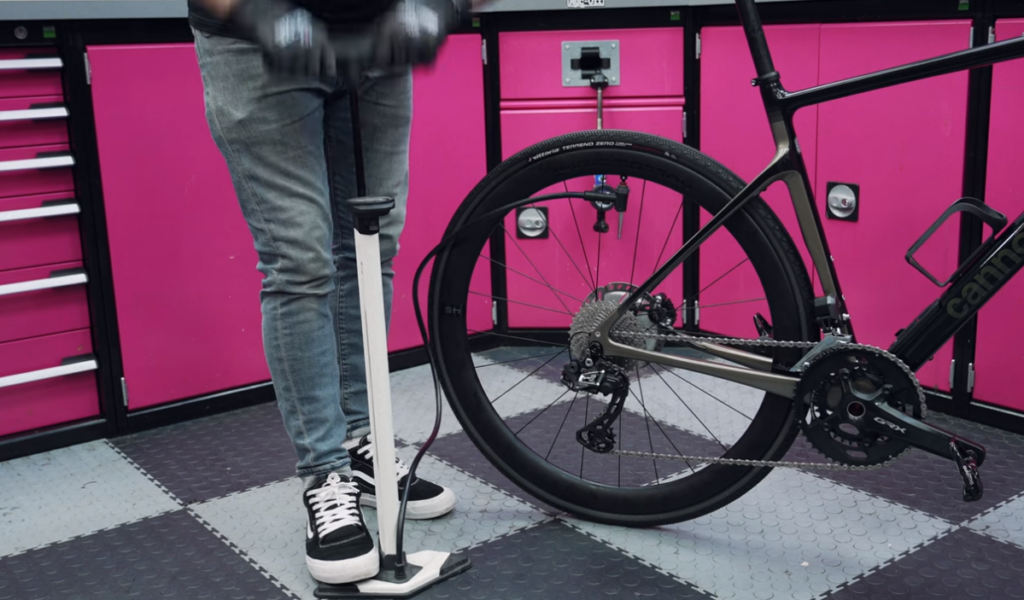
Use a floor pump to inflate the tire. You may need to remove the valve core to allow more air to flow into the tire.
If the tire does not seat properly, you may need to increase the tire pressure, use an air compressor or CO2 inflator, apply more tubeless sealant, or clean the rim and tire beads again.
Step By Step Guide to Seat a Tubeless Tire on Your Bike:
To begin seating the tubeless tire onto your bike’s rim, start by applying soapy water or sealant around the bead area of the tire. This lubrication will aid in creating an easier seal between the rubber and rim.
Next, position one side of the bead onto the rim evenly while leaving room for easy installation of the other side.
Once aligned correctly with one side already seated on the rim’s edge (also known as “the drop center”), grab an air compressor or floor pump with high-volume capabilities.
Inflate rapidly until there is sufficient air pressure buildup inside aim for about 40-60 psi initially but consult manufacturer guidelines specific to your setup.
1. Gathering the Necessary Tools:
To successfully seat a tubeless tire on your bike, you’ll need to gather a few essential tools. Here’s a list of everything you’ll need:
Tubeless Tire – Make sure you have the correct size and type of tubeless tire for your bike.
Tubeless Rim – Ensure that your rim is specifically designed for use with tubeless tires. It should have airtight seals and be compatible with tubeless valves.
Valve Core Remover Tool – This tool allows you to remove the valve core from the valve stem, enabling better airflow during inflation.
Tire Levers – Use these levers to help remove any existing tires from your rims if needed.
Sealant – Tubeless sealant helps prevent punctures by sealing small holes automatically as they occur during rides.
High-pressure Air Compressor or Floor Pump – A high-pressure air source is crucial for quickly inflating the tire and getting it seated properly on the rim.
Bucket or Tub of Soapy Water – This will be used to check for leaks once you’ve inflated and sealed the tire on the rim.
Rag or Paper Towels – Keep these handy for cleaning up any spills or excess sealant during installation.
Safety Glasses/Goggles/Gloves – These protective items are important when working with sealants and other potentially harmful substances.
Remember, having all these tools readily available before starting will make the process smoother and more efficient.
2. Adding Sealant to The Tire:
When setting up a tubeless tire on your bike, adding sealant is an essential step to prevent punctures and maintain airtightness.
Here’s how you can effectively add sealant to your tubeless tire:
Choose the Right Sealant: Select a high-quality sealant that suits your needs and riding conditions. There are various options available in the market, each with different features such as longevity and performance.
Remove Valve Core: Using a valve core removal tool or pliers, carefully unscrew the valve core from the valve stem of your tubeless tire. This step allows for easier installation of sealant.
Shake Well: Before pouring it into the tire, shake the sealant bottle vigorously to ensure proper mixing of its components.
Pour Sealant: With one hand holding open the tire bead away from the rim edge, slowly pour an appropriate amount of sealant through the valve stem into the tire cavity using either a dedicated injector or by removing part of the bead.
Reinstall Valve Core: Once you have poured in enough sealant (refer to manufacturer guidelines), reinsert and tighten back in place by screwing on the valve core firmly with pliers or a specialized tool.
Rotate and Shake: Spin and rotate both wheels horizontally while tilting them side-to-side gently for about 30 seconds per wheel to distribute and evenly coat all internal surfaces with sealant.
Inflate Tire: After ensuring that all sides are coated properly, inflate your tires according to recommended pressure levels specified by their respective manufacturers using either an air compressor or manual pump.
Check for Leaks: To verify if there are any leaks present after adding sealants, perform a visual
3. Installing the New Tubeless Tire:
When it comes to installing a new tubeless tire on your bike, following the correct steps is crucial for a successful and hassle-free experience.
Here’s a step-by-step guide to help you get started:
Prepare Your Tools: Before beginning the installation process, gather all the necessary tools such as tire levers, sealant, an air compressor or pump with a suitable valve head, and a bucket of soapy water.
Clean Rim Surface: Thoroughly clean the rim surface using soapy water and ensure there are no dirt particles or debris left behind that could affect proper tire seating.
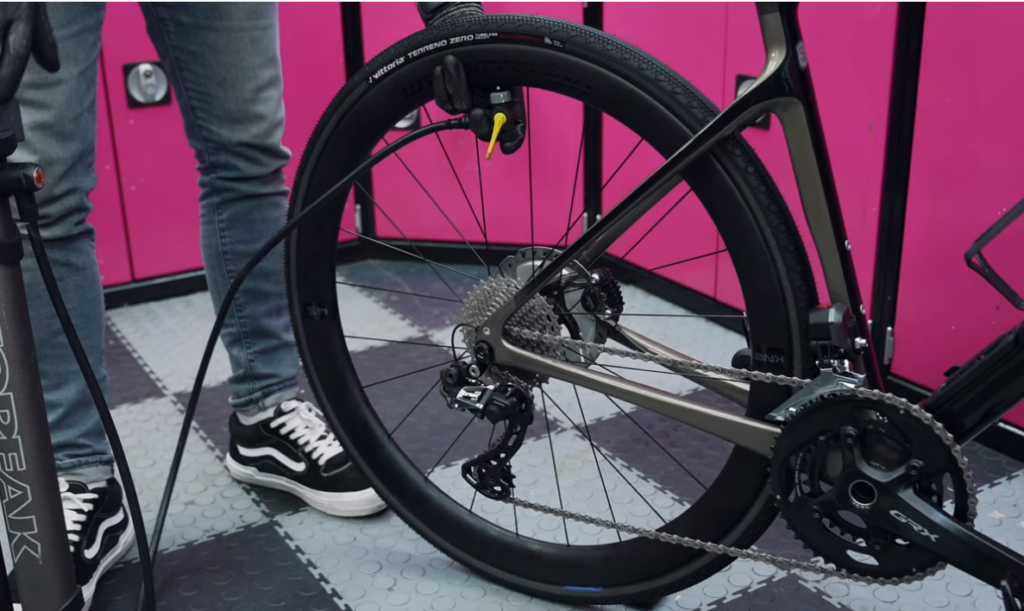
Install Valve Stem: Insert the tubeless valve stem into its designated hole on the rim from inside-outwards ensuring that it fits tightly.
Mount One Side of Tire Bead: Place one side of your new tubeless tire onto the rim starting at the valve stem location. Using your hands or preferably plastic-tipped tire levers if needed, work around slowly stretching and pushing down on each section until you reach back to where you started.
Apply Sealant (if not pre-applied): If your new tubeless tire doesn’t come pre-coated with sealant, use an appropriate amount according to manufacturer instructions before proceeding further.
Seat Second Side of Tire Bead: While making sure that no part of the first mounted side slips off during this step; position yourself opposite to where you started mounting initially (180 degrees apart). With both hands near each other but applying equal pressure across their width simultaneously push downward towards centerline until second-side bead pops over lip onto outside edge of rim.
Check and Adjust Tire Pressure: Inflate the tire gradually with an air compressor or pump while keeping a close eye on the bead seating process. Listen for any popping sounds indicating proper seating, and visually inspect to ensure both tire beads are evenly seated around the entire rim circumference.
Test for Leaks: Once fully inflated, inspect the tire for any leaks by applying a mixture of soapy water to the sidewalls and valve stem area. Look out for bubbles forming which indicate air leakage and address accordingly by adjusting tire pressure or reseating if necessary.
4. Testing for A Secure Fit:
To ensure that your tubeless tire is properly seated and securely fitted on your bike, follow these steps:
Inspect the Bead: First, inspect the bead of the tire to make sure it is evenly seated all around the rim. Look for any visible gaps or areas where the bead might not be fully engaged.
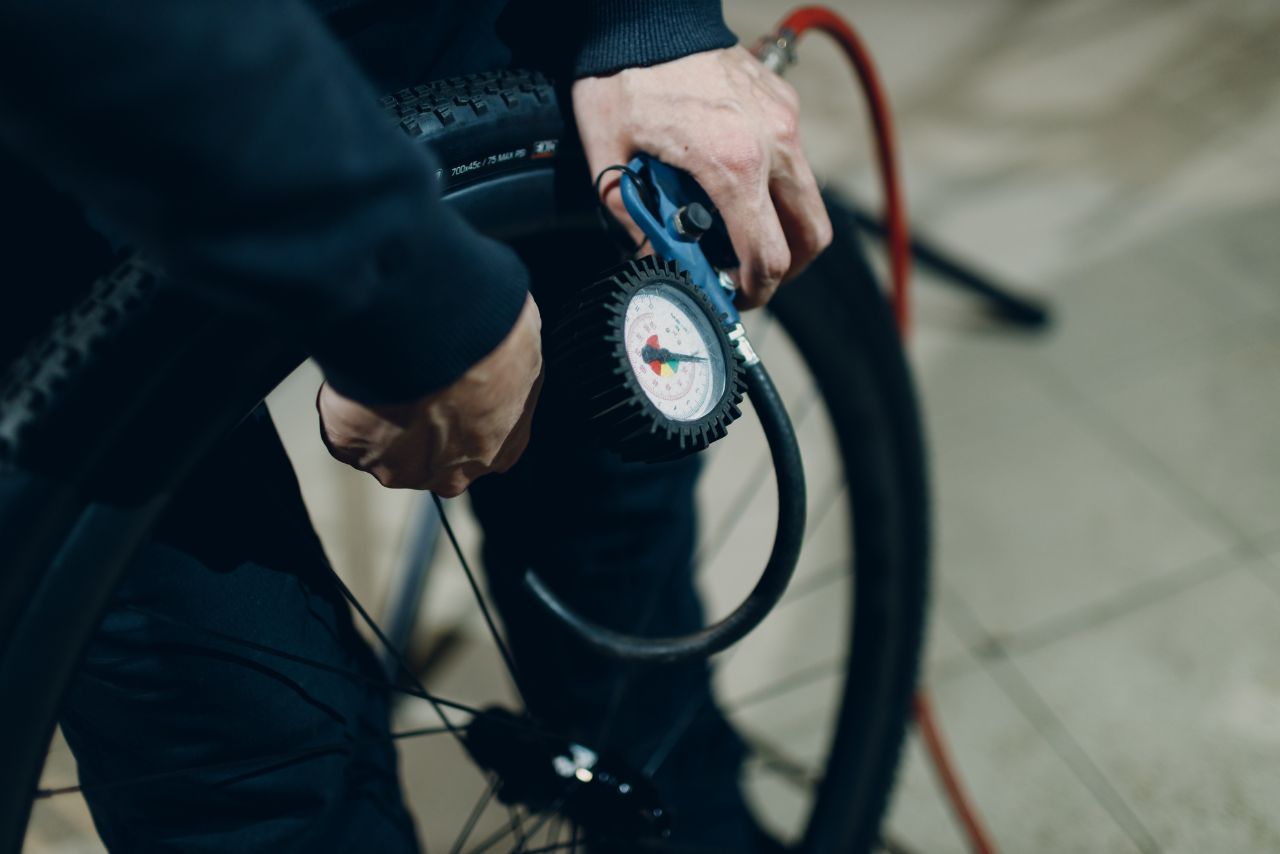
Check Air Pressure: Inflate the tire to its recommended pressure using a high-pressure floor pump or an air compressor. This will help to seat the tire onto the rim properly.
Listen for Popping Sounds: As you inflate the tire, listen carefully for popping sounds. These sounds indicate that the beads are seating against both sides of the rim correctly.
Observe Uniform Bead Seating: Examine both sides of your wheel closely while inflating it gradually with short bursts of air. Ensure that there is an even gap between each side of the rim and both beads of your tire throughout its circumference.
Apply Soapy Water Solution: To further test if your tubeless tire is secure, apply a soapy water solution along each side of your wheel’s outer edge where it meets with both beads of your tire.
Look for Bubbles: With air in your inflated tires, spin them slowly while observing closely any signs of bubbles forming around either side’s bead area from beneath soapy water application spots bubbles signify possible leaks and insecure fitment.
Reposition if Needed: If you notice any irregularities during this testing process—such as uneven seating or bubbling it may mean that one or more sections are not fitting securely enough onto their respective rims’ edges.
Gently deflate some air from within;
Push down on those specific areas until they pop back into place;
Reinflate gently up to recommended pressure levels again.
Note: If you are unable to achieve a secure fit after following these steps, it is advisable to seek assistance from a professional bicycle mechanic or tire specialist.
Remember, ensuring your tubeless tire is securely seated and fitted will enhance your riding experience and reduce the risk of unexpected punctures or accidents.
How to Seat a Tubed Motorcycle Tire?
Tools and materials:
Tubed motorcycle tire
Tube
Tire levers
Air compressor or floor pump
Valve core remover (optional)
Soapy water
Lubricant
Instructions:How to Seat a Bike Tire?
Remove the valve core from the tire. This will allow air to escape from the tire and make it easier to seat the bead.
Clean the rim and tire beads with soapy water. This will help to remove any dirt or debris that could prevent the tire from seating properly.
Apply a lubricant to the tire beads. This will help to prevent the tire from sticking to the rim and make it easier to seat the bead.
Start at the valve stem and work your way around the rim, pushing the tire bead into the rim’s channel. Use your hands and thumbs to exert even pressure on the tire, gradually moving around the rim.
If the tire bead is difficult to seat, you can use tire levers to help you. Insert the tire lever between the tire bead and rim, then pry the tire bead over the edge of the rim. Be careful not to damage the tire or tube.
Once both sides of the tire bead are in the rim’s channel, inflate the tire. You may need to use an air compressor or floor pump to get the tire to seat properly.
Once the tire is inflated, listen for a “pop” sound, which indicates that the bead has seated properly.
Reinstall the valve core.
Tips: How to Seat a Bike Tire?
Be patient. It may take a few tries to seat a tubed motorcycle tire. Don’t give up if you don’t get it right the first time.
Use a high-quality lubricant. A good lubricant will help to prevent the tire from sticking to the rim and make it easier to seat the bead.
Be careful not to damage the tire or tube when using tire levers.
If you are having trouble seating the tire, you can take it to a motorcycle shop and they will be able to help you.
How to Seat a Tubeless Tire on A Rim?
Here are the steps on how to seat a tubeless tire on a rim:
Tools and materials:
Tubeless tire
Tubeless sealant
Floor pump
Valve core remover (optional)
Soapy water
Rag
Gloves
Instructions:
Clean the rim and tire beads with soapy water. This will help to remove any dirt or debris that could prevent the tire from seating properly.
Apply a thin layer of tubeless sealant to the inside of the tire. This will help to create a seal between the tire and rim and prevent air from escaping.
Install the tire on the rim, making sure that the bead is seated properly on both sides of the rim.
Use a floor pump to inflate the tire. You may need to remove the valve core to allow more air to flow into the tire.
Once the tire is inflated, listen for a “pop” sound, which indicates that the bead has seated properly.
If the tire does not seat properly, you may need to:
Increase the tire pressure
Use an air compressor or CO2 inflator
Apply more tubeless sealant
Clean the rim and tire beads again
Tips:
Be patient. It may take a few tries to seat a tubeless tire. Don’t give up if you don’t get it right the first time.
Use a high-quality tubeless sealant. A good tubeless sealant will help to create a tight seal between the tire and rim and prevent air from escaping.
Be careful not to overinflate the tire. Overinflating the tire can damage the tire or rim.
If you are having trouble seating the tire, you can take it to a bike shop and they will be able to help you.
How to Seat Tubeless Tire with Compressor?
Here are the steps on how to seat a tubeless tire with a compressor:
Clean the rim and tire beads with soapy water. This will help to remove any dirt or debris that could prevent the tire from seating properly.
Apply a thin layer of tubeless sealant to the inside of the tire. This will help to create a seal between the tire and rim and prevent air from escaping.
Install the tire on the rim, making sure that the bead is seated properly on both sides of the rim.
Attach the compressor hose to the valve stem.
Inflate the tire to 30-40 psi.
Listen for a “pop” sound, which indicates that the bead has seated properly.
If the tire does not seat properly, you may need to:
Increase the tire pressure
Use a tire lever to help seat the bead
Apply more tubeless sealant
Clean the rim and tire beads again
Tips:
Be patient. It may take a few tries to seat a tubeless tire with a compressor. Don’t give up if you don’t get it right the first time.
Use a high-quality tubeless sealant. A good tubeless sealant will help to create a tight seal between the tire and rim and prevent air from escaping.
Be careful not to overinflate the tire. Overinflating the tire can damage the tire or rim.
If you are having trouble seating the tire, you can take it to a bike shop and they will be able to help you.
Here Are Some Additional Tips that Might Help You Seat a Stubborn Tubeless Tire with A Compressor:
Remove the valve core. This will allow more air to flow into the tire and make it easier to seat the bead.
Use a tire lever to help seat the bead. Insert the tire lever between the tire bead and rim, then pry the tire bead over the edge of the rim. Be careful not to damage the tire or rim.
Use a strap or ratchet to hold the tire in place while you are inflating it. This will help to prevent the tire from slipping around and making it harder to seat the bead.
Apply a bead lubricant to the tire beads. This will help to prevent the tire from sticking to the rim and make it easier to seat the bead.
Use a higher pressure compressor. A higher pressure compressor can provide more force to seat the bead more easily.
Watch Video: How to Seat a Tubeless Tire?
Conclusion: How to Seat a Tubeless Tire?
Seating a tubeless tire on your bike is an essential skill for any cyclist. By following the step-by-step process outlined in this article, you can ensure a successful and hassle-free installation.
Remember to start by preparing the rim and tire properly, ensuring they are clean and free from debris. Then, use an appropriate sealant to create an airtight seal between the tire and rim.
Utilize a compressor or floor pump with high-pressure capabilities to inflate the tire rapidly while maintaining control over pressure levels.
FAQs
Why Would I Want to Seat a Tubeless Tire?
Seating a tubeless tire is necessary when installing a new tire or when setting up a tubeless tire system. It ensures that the tire and rim form a tight seal, preventing air from escaping and allowing the tire to hold air pressure.
How Do I Prepare the Tire and Rim for Seating?
Before seating the tire, make sure the rim is clean and free of debris. Apply a thin layer of tire sealant to the rim and the tire bead to help create a seal.
How Do I Inflate the Tire to Seat It?
Connect your tubeless tire pump or air compressor to the valve stem and begin pumping air into the tire. The pressure should be high enough to force the tire bead to pop onto the rim and seal. While inflating, listen for a “pop” sound indicating that the tire has seated properly. Some pumps have a high-volume burst of air feature that can help to quickly seat the tire.
What Should I Do if The Tire Does Not Seat?
If the tire does not seat on the rim, check if the valve core is fully tightened. If it is, deflate the tire completely and try reseating it by partially mounting the tire onto the rim again and repeating the process. If the tire still does not seat, you may need to consult a professional or try using a different method such as using an air compressor or a tubeless tire inflator.
How Much Air Pressure Should I Use to Seat the Tire?
The recommended air pressure for seating a tubeless tire can vary depending on the tire and rim size. Start with a high pressure, around 40-50 psi, and adjust as needed. Be careful not to exceed the maximum recommended tire pressure indicated on the sidewall of the tire.
Do I Need to Add Sealant After Seating the Tire?
Yes, it is recommended to add tire sealant after seating the tire. This helps to seal any small punctures or leaks and provides added protection against flats. Use a tire sealant injector to inject the sealant into the tire through the valve stem.