If you’re experiencing issues with your ATV’s electrical system, one possible culprit could be a bad voltage regulator. The voltage regulator plays a crucial role in maintaining a consistent electrical output from the ATV’s charging system.
When it malfunctions, it can lead to a range of ATV Bad Voltage Regulator Symptoms that can affect the overall performance of your ATV.
One common symptom of a faulty voltage regulator is inconsistent or fluctuating voltage levels.
Another sign to watch out for is overcharging, which can cause damage to the battery and other electrical components.
Understanding the symptoms of a bad voltage regulator can help you diagnose and resolve electrical issues with your ATV, ensuring that it runs smoothly on your next off-road adventure.
Common Symptoms of a Bad ATV Voltage Regulator
If you suspect that your ATV’s voltage regulator is on the fritz, there are several symptoms you should be on the lookout for.
| Symptom | Description |
|---|---|
| Battery Drain | Frequent loss of charge or difficulty holding a charge |
| Inconsistent Electrical Performance | Flickering or dimming headlights, erratic gauge readings, malfunctioning lights |
| Overcharging or Undercharging | Batteries being overcharged or undercharged, leading to various issues |
| Electrical System Failures | Stalling, difficulty starting the engine, or complete electrical failure |
| Burning Smell or Smoke | Overheating of the voltage regulator resulting in odors or smoke emission |
Here are some common signs that indicate a bad voltage regulator:
Battery Issues:
One of the most evident symptoms is a constantly dying battery. If your ATV’s battery is frequently losing charge or struggles to hold a charge, it could be due to a faulty voltage regulator.
Keep an eye out for repeated jump-starts or the need to use a battery charger more often than usual.
Inconsistent Electrical Performance:
A bad voltage regulator can lead to varying electrical performance. You may notice flickering or dimming headlights, erratic gauge readings, or malfunctioning indicators and lights.
These inconsistencies can be frustrating and potentially dangerous, especially when riding at night or in low visibility conditions.
Overcharging or Undercharging:
Another indicator of a faulty voltage regulator is either overcharging or undercharging of the ATV’s electrical system.
Overcharging can cause damage to the battery and other electrical components, while undercharging can result in poor performance and premature battery failure.
Electrical System Failures:
A malfunctioning voltage regulator can have a ripple effect on the entire electrical system of your ATV.
You might experience issues like stalling, difficulty starting the engine, or even complete electrical system failure. These problems can disrupt your ride and require immediate attention.
Burning Smell or Smoke:
In severe cases, a failing voltage regulator can overheat and emit a burning smell or smoke.
If you notice any unusual odors or smoke coming from the ATV, it is crucial to stop riding immediately and inspect the electrical system to prevent potential fire hazards.
Remember, these symptoms may not always exclusively point to a bad voltage regulator, as other electrical issues can have similar effects. If you observe one or more of these signs, it’s advisable to consult a qualified ATV technician to diagnose the problem accurately and perform the necessary repairs.
How to Test the ATV Voltage Regulator?
Testing the voltage regulator on your ATV is a straightforward process that can help you diagnose any problems with it. Here’s a step-by-step guide on how to do it:
Gather the Necessary Tools:
Before you start testing the voltage regulator, make sure you have the following tools handy:
| Tools Required | |
|---|---|
| Multimeter | Measure voltage |
| Screwdriver | Remove panels |
- Multimeter: to measure voltage and continuity.
- Screwdriver: to remove any necessary panels or covers.
Testing the Regulator’s Continuity:
Signs of Voltage Regulator Failure in ATVs
When it comes to ATVs, a bad voltage regulator can cause a range of electrical problems. If you suspect that your ATV’s voltage regulator is failing, here are some common signs to look out for:
ATV Bad Voltage Regulator Symptoms:
| Symptom | Description |
|---|---|
| Inconsistent or Dim Lights | Flickering lights, dim headlights, or lights turning on and off randomly can indicate a bad voltage regulator. |
| Battery Troubles | Constantly dying battery or difficulty holding a charge might suggest that the voltage regulator is not functioning properly. |
| Electrical Component Failures | Malfunctioning ignition system, starter motor, or fuel pump can be a result of a voltage regulator that is not providing a consistent and regulated voltage. |
| Overheating | Excessive heat buildup in the electrical system can be caused by a failing voltage regulator, potentially leading to further damage to the regulator and other electrical components. |
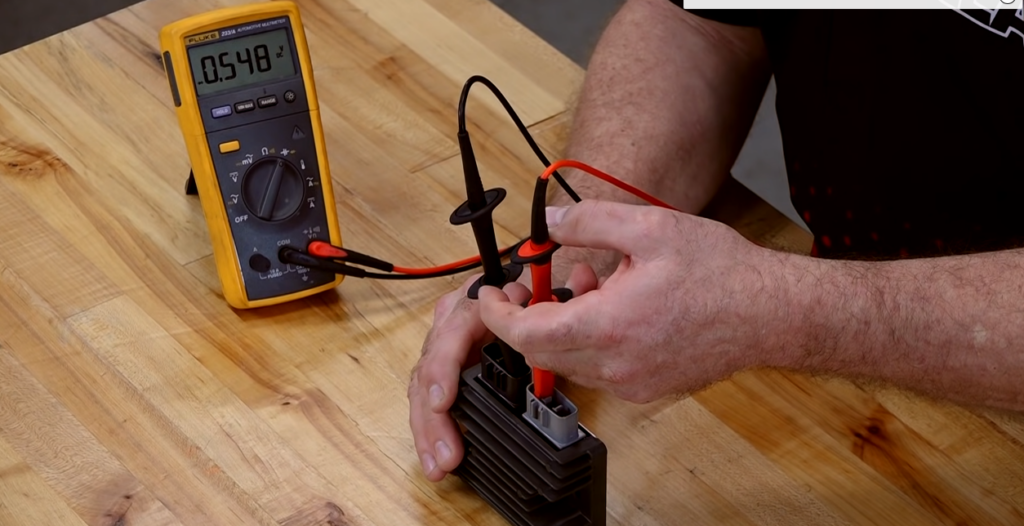
| Excessive or Fluctuating Voltage | Measuring the voltage output with a multimeter can help identify a failing voltage regulator. If the readings show excessively high or fluctuating voltage, it’s likely that the regulator is faulty. |
Steps to Replace a Faulty ATV Voltage Regulator
If you suspect that your ATV’s voltage regulator is causing issues, it’s important to replace it promptly to avoid further damage.
Here are the steps you can follow to replace a faulty ATV voltage regulator:
| Steps | Description |
|---|---|
| 1 | Gather the necessary tools |
| 2 | Disconnect the battery |
| 3 | Locate the voltage regulator |
| 4 | Remove the old voltage regulator |
| 5 | Install the new voltage regulator |
| 6 | Reconnect the battery |
| 7 | Test the new voltage regulator |
| 8 | Double-check all connections |
Watch Video: ATV Bad Voltage Regulator Symptoms:
FAQs
What Is a Voltage Regulator?
A: A voltage regulator is a device that regulates the output voltage of an electrical system, ensuring that it stays within a certain range to prevent damage to the system’s components.
What is an ATV?
A: An ATV (All-Terrain Vehicle) is a small vehicle with handlebars for steering, designed for off-road use. It is commonly used for recreational activities or as a utility vehicle.
How Can I Diagnose a Bad Voltage Regulator on My Atv?
To diagnose a bad voltage regulator on your ATV, you can perform a few tests:
Battery voltage test: Use a multimeter to measure the voltage of your ATV’s battery. A fully charged battery should read around 12.6 volts.
If the voltage is significantly higher or lower, it may indicate a problem with the voltage regulator.
Can I Replace the Voltage Regulator on My Atv Myself?
If you have some mechanical knowledge and experience, you may be able to replace the voltage regulator on your ATV yourself.
However, it is recommended to consult the ATV’s manual or seek professional assistance to ensure proper installation and prevent further damage.
How Much Does It Cost to Replace a Bad Voltage Regulator on An Atv?
The cost of replacing a voltage regulator on an ATV can vary depending on the make and model of the ATV and whether you choose to do it yourself or hire a professional.
Generally, the cost can range from $50 to $200 for the part, with additional costs for labor if you choose to have it replaced by a professional.
Summary! ATV Bad Voltage Regulator Symptoms:
It is important to be aware of the symptoms of a bad voltage regulator in your ATV. By recognizing these signs early on, you can prevent further damage to your vehicle and ensure its optimal performance.
It is essential to address these symptoms promptly by consulting a professional ATV mechanic or technician. They will be able to diagnose the problem accurately and provide the necessary repairs or replacements.
Remember, regular maintenance and inspections can help prevent voltage regulator issues and ensure a smooth and trouble-free ride.
| Symptoms | Possible Causes |
|---|---|
| Dim or flickering headlights | Failing voltage regulator |
| Dead battery | Faulty voltage regulator |
| Overcharging battery | Malfunctioning regulator |
| Inconsistent electrical issues | Faulty voltage regulator |
| Difficulty starting the ATV | Faulty voltage regulator |
By staying informed and attentive to the signs of a bad voltage regulator, you can keep your ATV running smoothly and avoid costly repairs in the long run.